Materijali za Virtualizacija na Linuxu -- jednostavan izbor zar ne?
- Virtualisation in Debian - Present and future - DebConf 2008
Hardware
CPU
Support for hardware virtualization:
egrep '^flags.*(vmx|svm)' /proc/cpuinfo
| vmx/svm | no vmx/svn | |
| USB | kvm | qemu+kqemu |
| no USB | VirtualBox |
How much CPU do I use? :-)
dpavlin@brr:~$ cpufreq-info
cpufrequtils 004: cpufreq-info (C) Dominik Brodowski 2004-2006
Report errors and bugs to cpufreq@lists.linux.org.uk, please.
analyzing CPU 0:
  driver: acpi-cpufreq
  CPUs which need to switch frequency at the same time: 0
  hardware limits: 2.40 GHz - 3.20 GHz
  available frequency steps: 3.20 GHz, 2.80 GHz, 2.40 GHz
  available cpufreq governors: userspace, powersave, ondemand, conservative, performance
  current policy: frequency should be within 2.40 GHz and 3.20 GHz.
                  The governor "ondemand" may decide which speed to use
                  within this range.
  current CPU frequency is 2.40 GHz.
  cpufreq stats: 3.20 GHz:1.80%, 2.80 GHz:0.00%, 2.40 GHz:98.20%  (17)
Disk performance
Have many disks. More disk spindles brings more than capacity alone! (Same as in databases)
Speed
Disk platter transfer speed
If you think that disk has constant transfer speed, ZCAV has interesting graphs
Individial disks
Slow laptop 2.5" 5400 disk
dpavlin@llin:~$ sudo hdparm -i /dev/sda

/dev/sda:

 Model=FUJITSU MHV2080BH                       , FwRev=00840028, SerialNo=        NW05T6B29HM5
 Config={ HardSect NotMFM HdSw>15uSec Fixed DTR>10Mbs }
 RawCHS=16383/16/63, TrkSize=0, SectSize=0, ECCbytes=4
 BuffType=DualPortCache, BuffSize=8192kB, MaxMultSect=16, MultSect=?16?
 CurCHS=16383/16/63, CurSects=16514064, LBA=yes, LBAsects=156301488
 IORDY=on/off, tPIO={min:240,w/IORDY:120}, tDMA={min:120,rec:120}
 PIO modes:  pio0 pio1 pio2 pio3 pio4
 DMA modes:  mdma0 mdma1 mdma2
 UDMA modes: udma0 udma1 udma2 udma3 udma4 *udma5
 AdvancedPM=yes: mode=0x80 (128) WriteCache=enabled
 Drive conforms to: unknown:  ATA/ATAPI-3,4,5,6,7

 * signifies the current active mode

dpavlin@llin:~$ sudo hdparm -tT /dev/sda
/dev/sda:
 Timing cached reads:   1566 MB in  2.00 seconds = 782.85 MB/sec
 Timing buffered disk reads:   66 MB in  3.03 seconds =  21.79 MB/sec
Interesting numbers are BuffSize (cache in disk) and MaxMultSect which we want to use for read-ahead param:
hdparm -m 16 -a 16 /dev/sda
This will decrease a bit speed of linerar buffer reads which hdparm uses, but we will pull from disk only blocks which are allready in cache, improving random read/write performance.
To find optimal readahead for your drive using hdparm access pattern you can use hdparm-readahead.pl which will try different combinations for you.
Faster (!) external 3.5 USB disk (no hdparm -i on USB), but just because it's another disk not loaded by system.
dpavlin@llin:~$ sudo hdparm -tT /dev/sdb

/dev/sdb:
 Timing cached reads:   1508 MB in  2.00 seconds = 753.72 MB/sec
 Timing buffered disk reads:   56 MB in  3.03 seconds =  18.48 MB/sec
Software RAID
Home-made software md RAID 5 array from SATA drives:
-
dscf0002
Dobrica Pavlinusic posted a photo:

-
dscf0001
Dobrica Pavlinusic posted a photo:

Final position in case, notice empty space above 4th disk which was occupied by disks before (which didn't have enough airflow because of that)
-
dscf0012
Dobrica Pavlinusic posted a photo:

-
dscf0007
Dobrica Pavlinusic posted a photo:
-
dscf0006
Dobrica Pavlinusic posted a photo:
-
dscf0005
Dobrica Pavlinusic posted a photo:

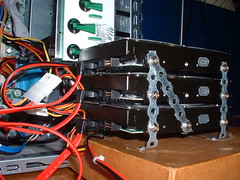
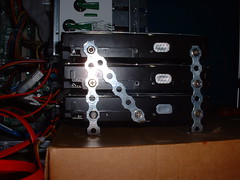
Note nice usage of construction metal stripes with holes which is usually used to hold fence. It has holes just the right size for screws to go through and hold disks nicely spaced (although a little bit more space would be ideal). It's soft enough to be bent at corners to produce nice and leveled space between it and case.
Blog post RAID5 for home describes setup in some details.
Drive info:
dpavlin@brr:~$ sudo hdparm -i /dev/sdd

/dev/sdd:

 Model=WDC WD5000AAKS-00YGA0                   , FwRev=12.01C02, SerialNo=     WD-WCAS80929678
 Config={ HardSect NotMFM HdSw>15uSec SpinMotCtl Fixed DTR>5Mbs FmtGapReq }
 RawCHS=16383/16/63, TrkSize=0, SectSize=0, ECCbytes=50
 BuffType=unknown, BuffSize=16384kB, MaxMultSect=16, MultSect=?16?
 CurCHS=16383/16/63, CurSects=16514064, LBA=yes, LBAsects=976773168
 IORDY=on/off, tPIO={min:120,w/IORDY:120}, tDMA={min:120,rec:120}
 PIO modes:  pio0 pio3 pio4
 DMA modes:  mdma0 mdma1 mdma2
 UDMA modes: udma0 udma1 udma2 udma3 udma4 udma5 *udma6
 AdvancedPM=no WriteCache=enabled
 Drive conforms to: Unspecified:  ATA/ATAPI-1,2,3,4,5,6,7

 * signifies the current active mode
Speed of individual drives in array:
dpavlin@brr:~$ sudo hdparm -tT /dev/sda /dev/sdb /dev/sdd

/dev/sda:
 Timing cached reads:   1982 MB in  2.00 seconds = 991.18 MB/sec
 Timing buffered disk reads:  232 MB in  3.03 seconds =  76.67 MB/sec

/dev/sdb:
 Timing cached reads:   2010 MB in  2.00 seconds = 1004.95 MB/sec
 Timing buffered disk reads:  228 MB in  3.01 seconds =  75.85 MB/sec

/dev/sdd:
 Timing cached reads:   2006 MB in  2.00 seconds = 1003.01 MB/sec
 Timing buffered disk reads:  230 MB in  3.01 seconds =  76.47 MB/sec
How are hey assembled into /dev/md0 RAID 5 array:
dpavlin@brr:~$ cat /proc/mdstat
Personalities : [raid6] [raid5] [raid4]
md0 : active raid5 sdd1[0] sda1[2] sdb1[1]
      976767872 blocks level 5, 64k chunk, algorithm 2 [3/3] [UUU]
Speed of array
dpavlin@brr:~$ sudo hdparm -tT /dev/md0

/dev/md0:
 Timing cached reads:   1986 MB in  2.00 seconds = 993.20 MB/sec
 Timing buffered disk reads:  434 MB in  3.01 seconds = 144.41 MB/sec
As expected RAID 5 speed is 75 + 75 + 0 (parity disk) ~ 144 MB/sec
Temperature
Disks don't like it hot!
root@brr:~# hddtemp /dev/sda /dev/sdb /dev/sdd
/dev/sda: WDC WD5000AAKS-00YGA0: 33°C
/dev/sdb: WDC WD5000AAKS-00YGA0: 32°C
/dev/sdd: WDC WD5000AAKS-00YGA0: 32°C
On output above, middle disk is /dev/sda so it's 1° hotter than other two. I could mitigate this with additional fan on front of case, but it's making enough noise already, so I'll leave it as is.
Data security
Smart
root@brr:~# smartctl --all /dev/sda | head -20
smartctl version 5.38 [i686-pc-linux-gnu] Copyright (C) 2002-8 Bruce Allen
Home page is http://smartmontools.sourceforge.net/

=== START OF INFORMATION SECTION ===
Model Family:     Western Digital Caviar Second Generation Serial ATA family
Device Model:     WDC WD5000AAKS-00YGA0
Serial Number:    WD-WCAS80815866
Firmware Version: 12.01C02
User Capacity:    500,107,862,016 bytes
Device is:        In smartctl database [for details use: -P show]
ATA Version is:   8
ATA Standard is:  Exact ATA specification draft version not indicated
Local Time is:    Sat Oct 11 00:27:01 2008 CEST
SMART support is: Available - device has SMART capability.
SMART support is: Enabled

=== START OF READ SMART DATA SECTION ===
SMART overall-health self-assessment test result: PASSED
Before you start to beleve in SMART as solution to all disk health problems, read Failure Trends in a Large Disk Drive Population

See also Bad block HOWTO for smartmontools if you ever get smart errors and don't just want to throw out your disk.
RAID
Also interesting is Some RAID Issues
Read also Why RAID 5 stops working in 2009
KVM
http://kvm.qumranet.com/kvmwiki/FAQ
Install
sudo apt-get install kvm
Migration
http://kvm.qumranet.com/kvmwiki/Migration
- 01-kvm-start.sh - how to start kvm
- config - variables included in following scripts
- 02-kvm-migration-incomming.sh
- 03-kvm-migration-running.sh
- kvm-migration-demo.sh - wrap it all in demo
Prepare shared disk image
Usually, you will use nfs for this. Edit /etc/exports and add something like (if your local network is 192.168.1.x):
/rest 192.168.1.0/255.255.255.0(rw)
And start nfs server
dpavlin@llin:~$ sudo /etc/init.d/nfs-user-server start
New target
Mount shared storage and run qemu which will receive running machine
dpavlin@squeak:~$ mkdir mnt/rest
dpavlin@squeak:~$ sudo mount 192.168.1.13:/rest mnt/rest/
dpavlin@squeak:~$ ls -al mnt/rest/iso/gparted-live-0.3.9-4.iso
-rw-r--r-- 1 dpavlin dpavlin 98347008 Oct  9 17:31 mnt/rest/iso/gparted-live-0.3.9-4.iso

dpavlin@squeak:~$ kvm -cdrom mnt/rest/iso/gparted-live-0.3.9-4.iso -incoming tcp://0:4444 -monitor stdio
Running source
dpavlin@llin:~$ kvm -m 128 -cdrom /rest/iso/gparted-live-0.3.9-4.iso -monitor stdio -no-kvm
QEMU 0.9.1 monitor - type 'help' for more information
(qemu) migrate tcp://192.168.1.30:4444
We use -no-kvm to disable kvm because our target machine doesn't have vmx|svm support!
QEMU
|
Contents: [virtualization_workshop]
|
Installation
sudo apt-get install qemu kqemu-source
kqemu module compilation on Debian:
sudo module-assistant a-i kqemu
VirtualBox
Seems to be best supported right now (package in Debian, optional drivers for Windows, starting unmodified VMWare machines -- after you guess right settings that is!)
- Windows ACPI problem - agp440.sys problem
- How to migrate existing Windows installations to VirtualBox - it's applicable to other emulators as well!
OSE version (no USB!) comes in Debian, compile vboxdrv with:
root@llin:~# module-assistant a-i virtualbox-ose
OpenVZ
OpenVZ is nice name-space virtualization, creating chroot jails on steroids, similar in spirit to Solaris zones. It ideal if you want to run single kernel and allocate resources using bean counters as opposed to hard-limits (20% of CPU as opposed to one core). Each slice is called VE.
Disk speed
dpavlin@zut:~$ sudo hdparm -tT /dev/cciss/c1d0 /dev/sda

/dev/cciss/c1d0:
 Timing cached reads:   2184 MB in  2.00 seconds = 1092.39 MB/sec
 Timing buffered disk reads:  324 MB in  3.02 seconds = 107.40 MB/sec

/dev/sda:
 Timing cached reads:   2144 MB in  2.00 seconds = 1071.89 MB/sec
 Timing buffered disk reads:  136 MB in  3.02 seconds =  45.02 MB/sec
Insert joke about enterprise storage
Add disk space to VE
We are using normal Linux LVM with single logical volume for all VEs.
First, resize logical volume:
root@koha-hw:~# vgextend -L +80G /dev/vg/vz
vgextend: invalid option -- L
  Error during parsing of command line.

root@koha-hw:~# lvextend -L +80G /dev/vg/vz
  Extending logical volume vz to 100.00 GB
  Logical volume vz successfully resized

root@koha-hw:~# resize2fs /dev/vg/vz
resize2fs 1.40-WIP (14-Nov-2006)
Filesystem at /dev/vg/vz is mounted on /vz; on-line resizing required
old desc_blocks = 2, new_desc_blocks = 7
Performing an on-line resize of /dev/vg/vz to 26214400 (4k) blocks.
The filesystem on /dev/vg/vz is now 26214400 blocks long.

root@koha-hw:~# df -h /vz/
Filesystem            Size  Used Avail Use% Mounted on
/dev/mapper/vg-vz      99G   20G   79G  21% /vz
Then, take a look how much space does VEs take:
root@koha-hw:~# vzlist -o veid,diskspace,diskspace.s,diskspace.h,diskinodes,diskinodes.s,diskspace.h
      VEID   DQBLOCKS DQBLOCKS.S DQBLOCKS.H   DQINODES DQINODES.S DQBLOCKS.H
    212052   11717220   15728640   20971520      61001     286527   20971520
    212226    6407804   10485760   12582912      69011     435472   12582912
alternativly, you can also execute df inside VEs:
root@koha-hw:~# vzlist -o veid -H | xargs -i sh -c "echo --{}-- ; vzctl exec {} df -h"
--212052--
Filesystem            Size  Used Avail Use% Mounted on
simfs                  15G   12G  3.9G  75% /
tmpfs                 2.0G     0  2.0G   0% /lib/init/rw
tmpfs                 2.0G     0  2.0G   0% /dev/shm
--212226--
Filesystem            Size  Used Avail Use% Mounted on
simfs                  10G  6.2G  3.9G  62% /
tmpfs                 2.0G     0  2.0G   0% /lib/init/rw
tmpfs                 2.0G     0  2.0G   0% /dev/shm
next, we will set diskpace on both VEs (becase we want them to share all available resources) to new logical volume size:
root@koha-hw:~# vzlist -o veid -H | xargs -i vzctl set {} --diskspace 100G:100G --save
Saved parameters for VE 212052
Saved parameters for VE 212226
This VEs are not in production, and one is development version of another. When we move to production, we want to enforce more strict limit on disk usage, to protect production machine from running out of disk space in case the development one goes wild.
VE management
We usually want to do some operations on bunch of VEs at once. This can be done using vzctl exec in one sweep like this:
Update Debian
vzlist -H -o veid | xargs -i vzctl exec {} 'apt-get update && apt-get -y upgrade' 2>&1 | tee ~/log
Quick reporting
You can read more about groupby.pl and sum.pl on my blog.
# install dependencies which are not part of standard lenny (sorry!)
cpanp i IPC::System::Simple

dpavlin@mjesec:~$ vzps -E axv --no-headers \
  | groupby.pl 'sum:($7+$8+$9*1024),1,count:1' --join 'sudo vzlist -H -o veid,hostname' --on 2 \
  | sort -rn | align | sum.pl -h
webgui.rot13.org  23      1026M OOOOOOOOOOOO                              1026M
0                385       855M OOOOOOOOOO------------                    1882M
saturn.ffzg.hr    32       544M OOOOOO-----------------------             2427M
eprints.ffzg.hr   18       351M OOOO-----------------------------         2778M
arh.rot13.org     20       224M OO----------------------------------      3003M
find getty processes
root@mljac:~# ps ax | grep getty | cut -c-5 | xargs vzpid
Pid     VEID    Name
5668    0       getty
5670    0       getty
5672    0       getty
5673    0       getty
5674    0       getty
5675    0       getty
9503    207016  getty
9504    207013  getty
9505    207013  getty
9534    207016  getty
9535    207015  getty
9536    207013  getty
9537    207013  getty
9538    207015  getty
9539    207015  getty
9540    207015  getty
9541    207016  getty
9542    207015  getty
9543    207016  getty
9545    207013  getty
9546    207013  getty
9547    207015  getty
9548    207016  getty
devices inside VE
For example, fuse
dpavlin@brr:/dev$ vzctl set 100 --devices c:10:229:rw --save
Links
vz-tools
Suite of perl scripts in spirit of xen-tools but for OpenVZ
Installation
Install perl dependencies from Debian packages
This step is optional. If you don't want to use perl modules from packages provided by your distribution, skip this step, and modules will be automatically installed in next one.
sudo apt-get install libio-prompt-perl libregexp-common-perl libdata-dump-perl
Install utilities from Debian packages
sudo apt-get install host
Checkout source
svn co svn://svn.rot13.org/vz-tools/trunk vz-tools
Check and install perl modules from CPAN
cd vz-tools
perl Makefile.PL
make
Please note that there is no need to run make install
Tools are runnable from current directory. This will probably change in later versions.
Usage
This is quick hand-on overview of commands to get you started.
All commands must be started with root priviledges
vz-create.pl
This will perform following steps:
- Create new virtual machine bootstraped using debootstrap
- Change root password
- Create single user
- Make small custimization like installing vim and apt-iselect
All commands will be echoed on screen, even passwords. However, if you want to learn steps in creating OpenVZ VE, this is very helpful.
To run interactive session which asks questions use:
./vz-create.pl
Other alternative is to just enter hostname (defined in /etc/hosts for example)
./vz-create.pl my-new-ve.exmple.com
or by specifing IP adress
./vz-create.pl 192.168.42.42
vz-optimize.pl
vz-clone.pl
root@black:~/vz-tools# time ./vz-clone.pl create 1001
Clone VE 1001 -> 101001
found LV /dev/vg/vz for /vz
vzquota : (warning) Quota is running, so data reported from quota file may not reflect current values
quota for 1001 | 10485760 < 20971520 | usage: 7826792
using existing /dev/vg/vz-clone-101001
Mounting /dev/vg/vz-clone-101001 to /tmp/vz-clone-101001
rsync /vz/private/1001 -> /tmp/vz-clone-101001/private
101001 new IP number: 10.42.42.42
101001 new hostname: clone-42.example.com

Please review config file: /etc/vz/conf/101001.conf
Add NAT for new VE with: iptables -t nat -A POSTROUTING -o eth0 -j MASQUERADE
Start clone of 1001 with: vzctl start 101001

real    1m57.347s
user    0m2.252s
sys     0m8.591s
Source
- There was an error: 404 Not Found
Related posts on my blog
-
bak-git: easy cloud configuration management
I wrote initial version of bak-git more than a month ago, and started using it to manage my share of Internet cloud. Currently, it's 16 hosts, some of them real hardware, some OpenVZ or LXC containers. Since then, I...
-
lxc-watchdog for OpenVZ - Linux Containers migration
I have been playing with Linux containers for a while, and finally I decided to take a plunge and migrate one of my servers from OpenVZ to lxc. It worked quite well for testing until I noticed lack of...
-
OpenVZ, VLANs, ethernet bridge and ssh tunneling
I know that title is mouthful. But, I occasionally use this blog as place to dump interesting configuration settings and it helps me remember configuration which helps me to remember it and might be useful to lone surfers who...
-
apache2-mpm-worker considered harmful to memory usage
Last few weeks I have been struggling with memory usage on one of machines which run several OpenVZ containers. It was eating whole memory in just few days: I was always fond of graphing system counters, and since reboots...
-
Sharing MySQL between OpenVZ containers
It seems that I wasn't the first one to have idea of sharing MySQL installation between OpenVZ containers. However, simple hardlink didn't work for me: root@koha-hw:~# ln /vz/root/212052/var/run/mysqld/mysqld.sock \ /vz/root/212056/var/run/mysqld/ ln: creating hard link `/vz/root/212056/var/run/mysqld/mysqld.sock' to `/vz/root/212052/var/run/mysqld/mysqld.sock': Invalid cross-device...
-
Storage appliance with containers using Linux and ZFS
I'm working on Linux version of Sun storage machines, using commodity hardware, OpenVZ and Fuse-ZFS. I'm do have working system in my Sysadmin Cookbook so I might as well write a little bit of documentation about it. My basic...
-
Enterprise storage in recession? What about Linux and ZFS?
My point of view First, let me explain my position. I was working for quite a few years in big corporation, and followed EMC storage systems (one from end of of last century and improvement that Clarion did on our...
-
Recording screencasts using ttyrec and ffmpeg
I'm preparing walk-through screencasts for workshop about virtualization so I needed easy way to produce console screencasts. First, I found TTYShare which displays ttyrec files using flash, but I really wanted to copy/paste parts of commands and disliked flash...
-
Moving data in a hurry? Copy disk images!
I have written about data migration from disk to disk before, but moving data off the laptop is really painful (at least for me). This time, I didn't have enough time to move files with filesystem copy since it...
-
Group by data in shell pipes
My mind is just too accustomed to RDBMS engines to accept that I can't have GROUP BY in my shell pipes. So I wrote one groupby.pl. Aside from fact that it somewhat looks like perl golfing (which I'm somewhat proud...
VMWare
Convert image to monolithic growable disk
This format is supported by other emulators, so it's a best choice.
dpavlin@llin:/rest/vmware/winxp$ vmware-vdiskmanager -r Windows\ XP\ Professional.vmdk -t 0 /mnt/usb/vmware/win-xp.vmdk
Using log file /tmp/vmware-dpavlin/vdiskmanager.log
Creating a monolithic growable disk '/mnt/usb/vmware/win-xp.vmdk'
  Convert: 57% done.
Resize disk image
dpavlin@llin:/mnt/usb/vmware$ qemu-img info win-xp.vmdk
(VMDK) image open: flags=0x2 filename=win-xp.vmdk
image: win-xp.vmdk
file format: vmdk
virtual size: 3.0G (3221225472 bytes)
disk size: 3.0G
There is a way to extend image using only qemu-img, but that involves converting image to raw and appending zeros at end to produce larger image. However, we will do that using VMWare's vmware-vdiskmanager
dpavlin@llin:/mnt/usb/vmware$ vmware-vdiskmanager -x 6Gb win-xp.vmdk
Using log file /tmp/vmware-dpavlin/vdiskmanager.log
  Grow: 100% done.
The old geometry C/H/S of the disk is: 6241/16/63
The new geometry C/H/S of the disk is: 12483/16/63
Disk expansion completed successfully.

WARNING: If the virtual disk is partitioned, you must use a third-party
         utility in the virtual machine to expand the size of the
         partitions. For more information, see:
         http://www.vmware.com/support/kb/enduser/std_adp.php?p_faqid=1647
This will make disk unbootable, so we will have to resize partition. Download GParted live CD and resize partition using it...
kvm -m 512 -hda win-xp.vmdk -no-acpi -std-vga -cdrom /rest/iso/gparted-live-0.3.9-4.iso -boot d
Convert vmdk to qcow
dpavlin@llin:/mnt/usb/vmware$ qemu-img convert -O qcow win-xp.vmdk win-xp.qcow
(VMDK) image open: flags=0x2 filename=win-xp.vmdk
dpavlin@llin:/mnt/usb/vmware$ ls -al win-xp.*
-rw-r--r-- 1 dpavlin dpavlin 3190906880 Oct  9 17:41 win-xp.qcow
-rw------- 1 dpavlin dpavlin 3208577024 Oct  9 17:35 win-xp.vmdk
Xen
disk speed
this is domU
root@vega:~# uname -a
Linux vega 2.6.18-6-xen-amd64 #1 SMP Mon Jun 16 23:42:47 UTC 2008 x86_64 GNU/Linux
root@vega:~# hdparm -tT /dev/hda1

/dev/hda1:
 Timing cached reads:   5488 MB in  2.00 seconds = 2750.74 MB/sec
 Timing buffered disk reads:  318 MB in  3.00 seconds = 105.98 MB/sec
Guest OS
Windows
- agp440.sys killed my VMWare XP installation!
- intelppm.dll blue screen of death -- http://kvm.qumranet.com/kvmwiki/Windows_ACPI_Workaround
- Install VBEMP x86 Project Universal VESA/VBE Video Display Driver to get different resolutions on virtual machine
Remove them:
cd c:\windows\system32\drivers
del agp440.sys
del intelppm.dll
Startup script:
# 3M RFID 810
usbdev=0403:6001

sudo chown -R $USER /proc/bus/usb/*

kvm -m 512 -hda win-xp.vmdk -no-acpi -std-vga -monitor stdio -usb -usbdevice host:$usbdev
USB sniffing:
info usbhost
Solaris
It will not boot pass "Loading Nexenta..." stage without kvm module loaded.
# to install from iso image
kvm -m 512 -hda solaris.vmdk -cdrom ../iso/nexenta-core-platform_1.0.1-b85-test4_x86.iso -boot d -net nic,model=rtl8139 -net user

# run after installation
kvm -m 512 -hda solaris.vmdk -net nic,model=rtl8139 -net user